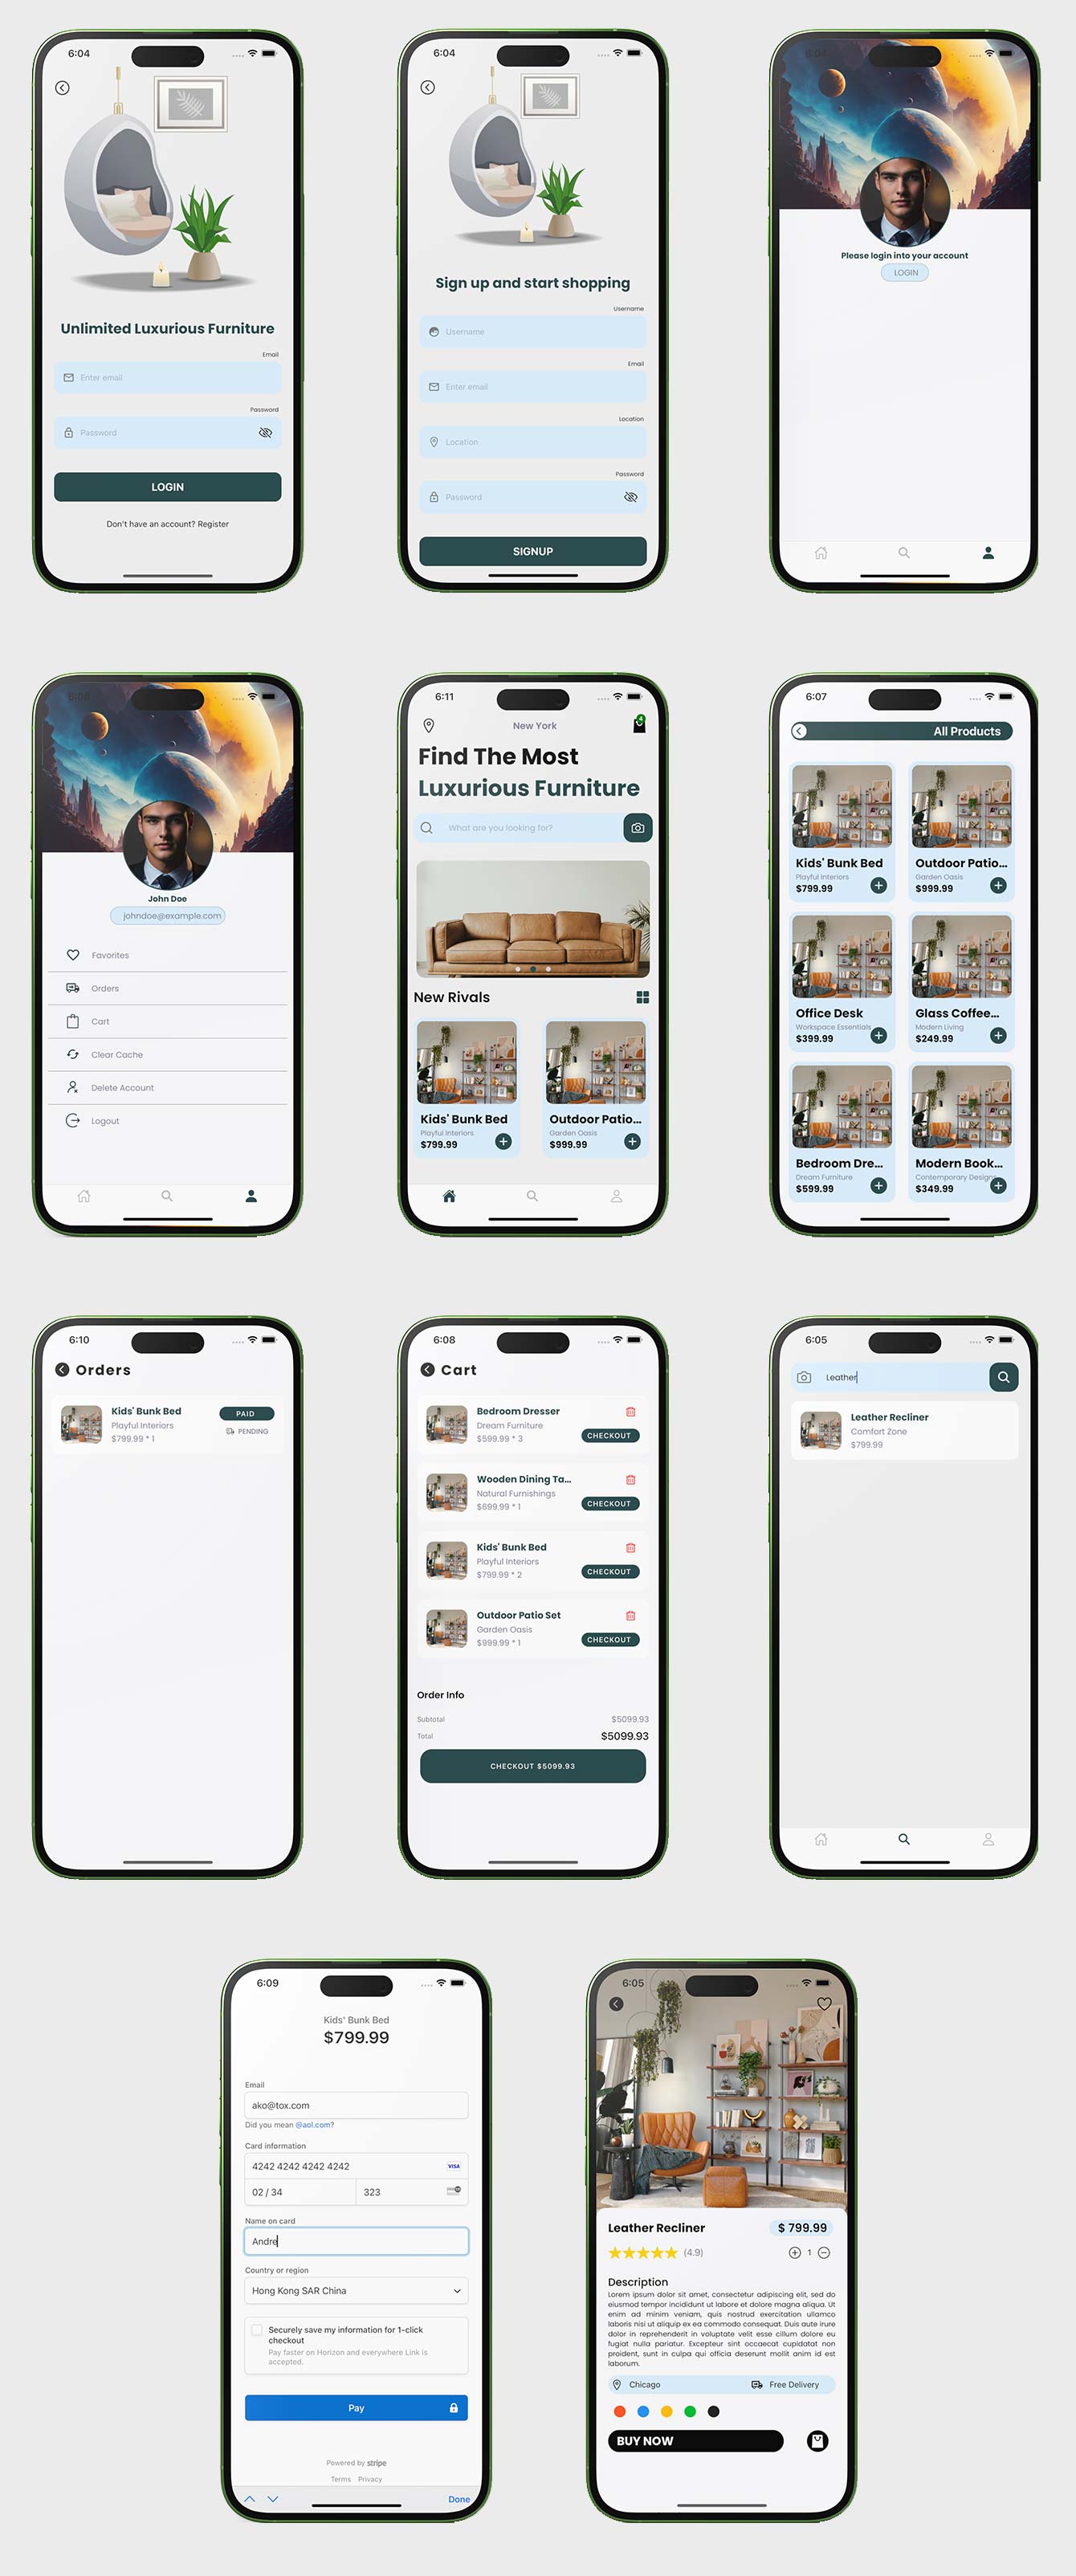
This is a furniture ecommerce app tutorial using React Native. Our app consist of a NodeJS Backend, a separate stripe Node server and React Native front end. If you want to build React Native travel app click here. The app features are as follows

App features
1. Registration with email
2. Email login
3. Viewing products latest products
4. Protective layer for unlogged used
5. Storing data in local storage using AsyncStorage
6. Adding and removing favorites
7. Add and remove products from the cart
8. View cart
9. Viewing orders and delivery status
10. Stripe payment
11. Search
12. Logout
13. Clear cache data
Get the complete code on Buymeacoffe
OR
Get the complete code on Patreon
Frontend
This mobile application has been developed using React Native, a popular framework for building cross-platform apps. The design process focused on incorporating the following key components: Text, TouchableOpacity, TextInput, StyleSheet, Image, ActivityIndicator, View, SafeArea, ScrollView, FlatList, and Alert.
To ensure code cleanliness and organization, the styles have been extracted into a separate file and imported into the relevant components where they are utilized. This approach promotes code modularity and maintainability.
State Management
In React components, there are two types of data that govern their behavior: props and state. Props are set by the parent component and remain fixed throughout the component's lifespan. On the other hand, state is used for data that can change over time. For clarification let’s take one use case of how we are going to be managing our state in our app. When capturing the changes in a text Input, this data changes every time a user type something in the text Input, so every time there’s is a change setstate is called onChangedText to store the context of the TextInput.
As good practice we initialize state in the constructor of a component. When you want to modify the state, using the setState method provided by React.
Backend
For the backend development of this application, we have chosen to use Node.js with the Express framework. We will utilize the following packages to enhance functionality: jsonwebtoken, nodemon, express, mongoose, cryptojs, dotenv
By the end of this course, you will gain proficiency in:
1. Node Mongo (CRUD): Performing Create, Read, Update, and Delete operations on a MongoDB database using Node.js and mongoose.
2. Obtain access token with jwt: Generating and validating JWTs for user authentication and authorization in your Node.js application.
3. Node.js RESTful API: Building RESTful APIs using Node.js and Express, handling HTTP requests, implementing CRUD operations, and delivering JSON responses.
Stripe Server
To ensure modularity and reusability, our application's backend architecture separates the Stripe server from the app server. This separation allows us to seamlessly integrate the server with different applications, regardless of the underlying backend framework as long as the order models are the same. Additionally, it helps distribute the server load effectively, reducing the strain on our main server.
The payment server plays a crucial role in handling order payment-related tasks and order creation upon successful payment. Stripe webhooks serve as the key mechanism for capturing responses from Stripe. When a payment is flagged as successful, we leverage these webhooks to receive the necessary information and trigger the creation of corresponding orders. Furthermore, we utilize the webhook data to provide real-time feedback to users regarding the success or failure of their payment attempts.
By maintaining a connection between the payment server and our app database, we ensure seamless data integration. This allows us to easily access and retrieve all the orders created in the payment server. Consequently, we can obtain comprehensive order information and present it to users or perform any other necessary operations.
Deployment
Backend
1. Open the terminal and run npm install
2. Run command npm start
Frontend
1. Open the terminal and run npm install
2. Run command npm start
3. To run the app on iOS press i and to run on android press a
Installation video part 1
Installation part 2
Installation part 3
2025-02-12 18:22:06
where is the assests
top right corner
2025-02-12 18:22:06
where is the assests
2025-02-12 18:22:02
where is the assests
2024-12-30 20:55:16
Not able to verify the email
2024-12-01 03:48:59
Where is the assets folder In github??
2024-09-27 17:23:03
where is the assets
Here they are https://www.dbestech.com/tutorials/react-native-e-commerce-app-tutorial
2024-08-14 10:52:41
can't find the assets folder
Creating a new tutorial on this. You need to wait. We will have a completely new ones.
2024-08-14 10:52:41
can't find the assets folder
2024-08-14 10:52:41
can't find the assets folder
2024-08-14 10:52:41
can't find the assets folder
2024-08-14 10:52:37
can't find the assets folder
2024-03-20 07:19:13
Asset files are at the top
2024-02-12 17:53:57
@Dylan I have sent you a mail. here is my address georgesdembele123@gmail.com
2024-02-12 06:48:47
If you still don't get email me at dylandbestech@gmail.com
2024-02-12 06:48:29
top right corner at the page (starter file)
 Starter file