Integrating Firebase Cloud Messaging (FCM) for push notifications in a React Native app can be challenging, especially when dealing with permissions, background and foreground notifications, and setting up notification channels. This guide walks you through the entire process, addressing common issues and providing solutions with detailed explanations and code snippets.
Before we dive into the code, make sure you have the following set up:

First, you need to set up Firebase in your project.
Run the following command to install the necessary Firebase dependencies:
The first step is to set up a Firebase project. Make sure you create a Firebase project in the console.
To use Firebase with React Native, you need to install several packages. Since Expo managed workflow does not support certain native modules, we will use the bare workflow.
Steps:
1. Eject from the Expo managed workflow:
npx expo run:android
Follow the prompts to configure your project. This will create the necessary android and ios directories for a bare React Native project.
2. Install Firebase packages:
npm install @react-native-firebase/app @react-native-firebase/messaging
3. Install the required native modules:
npm install react-native-permissions
Create a firebaseConfig.js file to initialize Firebase:
// firebaseConfig.js
import firebase from '@react-native-firebase/app';
const firebaseConfig = {
apiKey: "YOUR_API_KEY",
authDomain: "YOUR_AUTH_DOMAIN",
databaseURL: "YOUR_DATABASE_URL",
projectId: "YOUR_PROJECT_ID",
storageBucket: "YOUR_STORAGE_BUCKET",
messagingSenderId: "YOUR_MESSAGING_SENDER_ID",
appId: "YOUR_APP_ID",
measurementId: "YOUR_MEASUREMENT_ID"
};
if (!firebase.apps.length) {
firebase.initializeApp(firebaseConfig);
}
export default firebase;
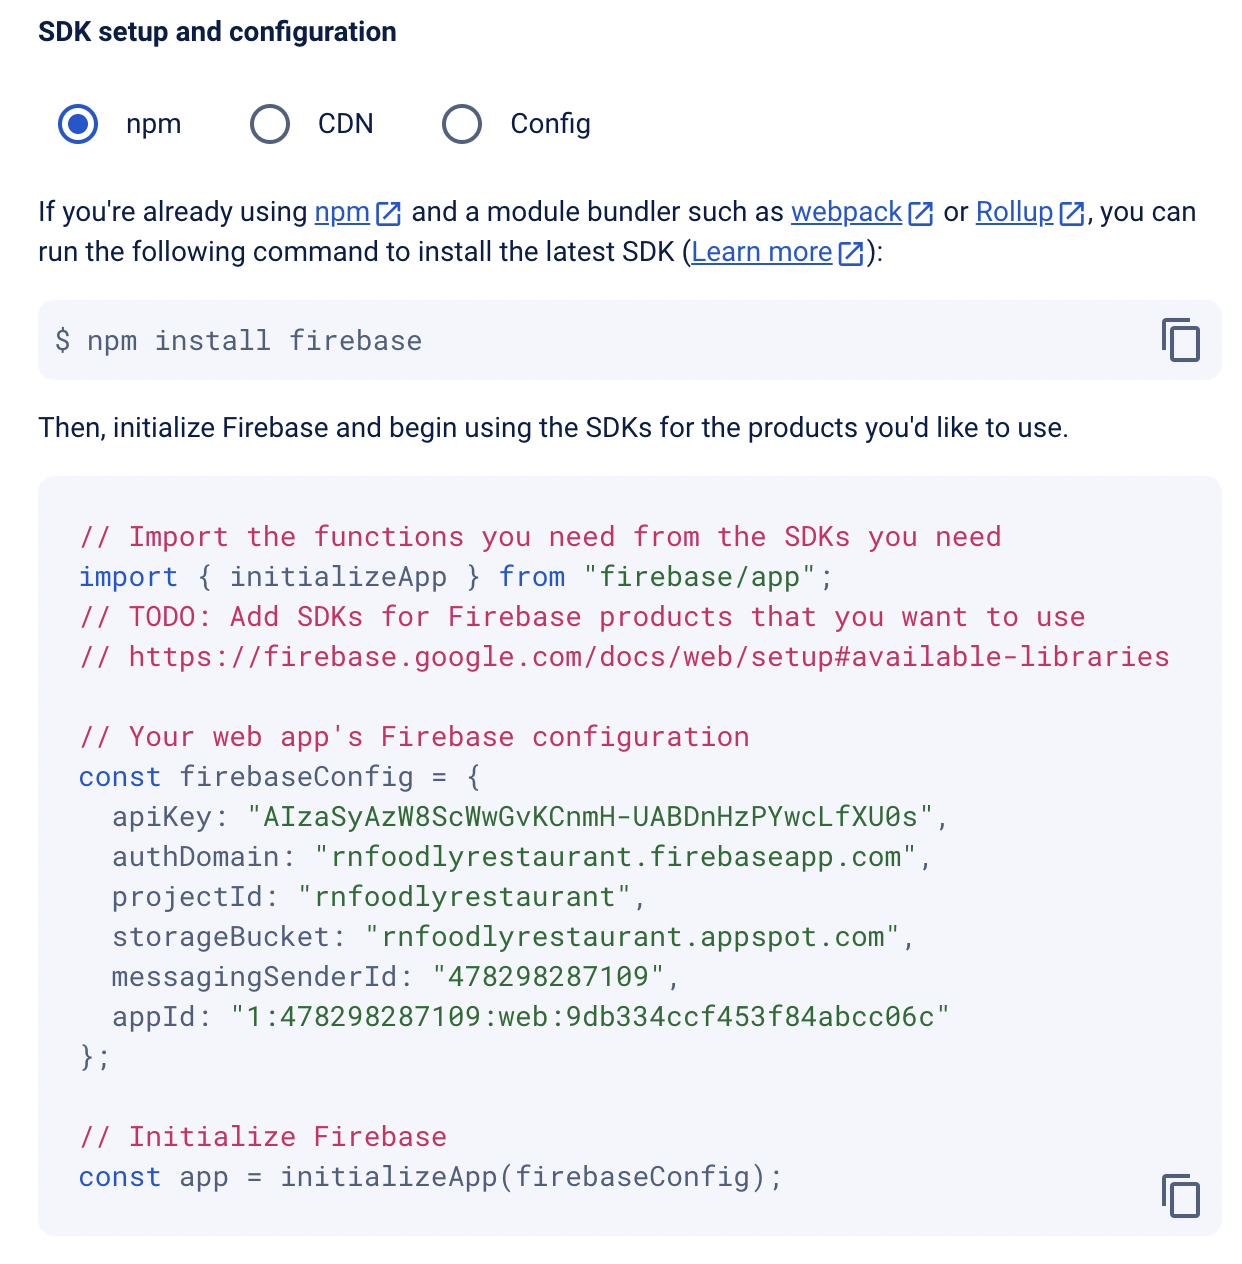
Replace the placeholders with your Firebase project's credentials. You will have this file once you create a web app for your project. Select your web app from firebase and you will see like below

Download the file and put it in the root of you project and name it anything you want. In my case I have named it firebaseConfig.js.
The firebaseConfig.js file is essential for initializing the Firebase SDK in your React Native app with your project's specific credentials. It ensures:
Overall, this setup is crucial for properly using Firebase services, including push notifications via FCM, ensuring your app can reliably communicate with Firebase.
Next, configure your Android project to use Firebase.
Ensure you have the following lines in your android/build.gradle:
buildscript {
dependencies {
classpath 'com.google.gms:google-services:4.3.8'
}
}
allprojects {
repositories {
google()
mavenCentral()
}
}
Google Services Plugin: Adds the Google services plugin (com.google.gms:google-services) necessary for using Firebase features like authentication, analytics, and Cloud Messaging (FCM).
Repository Access: Ensures that Gradle can access Google's Maven repository and Maven Central to download necessary dependencies, including Firebase libraries.
Add the Google services plugin and the Firebase dependencies:
apply plugin: 'com.google.gms.google-services'
dependencies {
implementation platform('com.google.firebase:firebase-bom:33.0.0')
implementation 'com.google.firebase:firebase-messaging'
}
Firebase BOM: The Firebase Bill of Materials (BOM) ensures that all Firebase libraries used in your project are compatible with each other. By specifying a single version for the BOM, you ensure that all Firebase dependencies align with this version, preventing version conflicts and compatibility issues.
Firebase Messaging: This line adds the Firebase Cloud Messaging (FCM) library to your project. FCM is used to send and receive push notifications. By including this dependency, you enable your app to handle messaging functions, such as receiving push notifications from Firebase.
Step 3: Update AndroidManifest.xml
Add the necessary permissions and services in your AndroidManifest.xml:
xmlns:tools="http://schemas.android.com/tools"
package="com.yourapp.package">
<application
android:name=".MainApplication"
android:allowBackup="true"
android:icon="@mipmap/ic_launcher"
android:label="@string/app_name"
android:roundIcon="@mipmap/ic_launcher_round"
android:theme="@style/AppTheme">
<meta-data
android:name="com.google.firebase.messaging.default_notification_channel_id"
android:value="default-channel-id" />
<service
android:name="com.google.firebase.messaging.FirebaseMessagingService"
android:exported="true"
tools:replace="android:exported">
<activity
android:name=".MainActivity"
android:configChanges="keyboard|keyboardHidden|orientation|screenSize"
android:label="@string/app_name"
android:launchMode="singleTop"
android:theme="@style/AppTheme"
android:windowSoftInputMode="adjustResize">
Requesting permissions is crucial for notifications to work correctly, especially on Android 13+.
In your App.js file, add the code to request notification permissions:
import messaging from '@react-native-firebase/messaging';
import PushNotification from 'react-native-push-notification';
const requestNotificationPermission = async () => {
try {
console.log("Requesting notification permission...");
const authStatus = await messaging().requestPermission();
const enabled =
authStatus === messaging.AuthorizationStatus.AUTHORIZED ||
authStatus === messaging.AuthorizationStatus.PROVISIONAL;
console.log('Notification permission status:', authStatus);
if (enabled) {
console.log('Notification permission granted.');
} else {
console.log('Notification permission denied.');
}
} catch (error) {
console.error('Error requesting notification permission:', error);
}
};
useEffect(() => {
requestNotificationPermission();
}, []);
This code snippet is responsible for handling notification permissions in a React Native application using Firebase Cloud Messaging (FCM) and a push notification library. The first part of the code imports the necessary libraries: messaging from @react-native-firebase/messaging and PushNotification from react-native-push-notification.
It then defines an asynchronous function, requestNotificationPermission, which requests notification permissions from the user. Inside this function, the requestPermission method from the messaging library is called, and the authorization status is checked.
If the status is either AUTHORIZED or PROVISIONAL, the function logs that the notification permission is granted; otherwise, it logs that the permission is denied. This function also includes error handling to log any issues that occur during the permission request process.
The second part of the code uses the useEffect hook to ensure that the requestNotificationPermission function is called when the component mounts.
The useEffect hook takes an empty dependency array as its second argument, which means that the effect will run only once, when the component is first rendered. This ensures that the app requests notification permissions as soon as it loads, allowing it to handle push notifications appropriately.
By centralizing the permission request logic in the useEffect hook, the code ensures that the necessary permissions are obtained without requiring additional user actions, streamlining the setup process for notifications in the application.
Creating notification channels is essential for managing notifications on Android.
import PushNotification from 'react-native-push-notification';
import { Platform } from 'react-native';
PushNotification.configure({
onRegister: function (token) {
console.log('TOKEN:', token);
},
onNotification: function (notification) {
console.log('NOTIFICATION:', notification);
notification.finish(PushNotification.FetchResult.NoData);
},
senderID: 'YOUR_SENDER_ID',
permissions: {
alert: true,
badge: true,
sound: true,
},
popInitialNotification: true,
requestPermissions: true,
});
export const createNotificationChannel = () => {
if (Platform.OS === 'android') {
PushNotification.createChannel(
{
channelId: "13761849018",
channelName: "rnfoodly8",
channelDescription: "foodly multivendor8",
playSound: true,
soundName: "default",
importance: 4,
vibrate: true,
},
(created) => console.log(`createChannel returned '${created}'`)
);
}
};
This code snippet imports necessary libraries for handling Firebase Cloud Messaging (FCM) and push notifications in a React Native application. It defines an asynchronous function, requestNotificationPermission, which requests notification permissions from the user.
The function logs the permission request status and checks if the authorization status is either AUTHORIZED or PROVISIONAL.
If granted, it logs that the notification permission is granted; otherwise, it logs that the permission is denied. The useEffect hook is used to call requestNotificationPermission when the component mounts, ensuring that the app requests notification permissions as soon as it loads.
import { createNotificationChannel } from './PushNotificationConfig';
useEffect(() => {
createNotificationChannel();
}, []);
Handling notifications while the app is in the foreground requires setting up listeners.
useEffect(() => {
const unsubscribe = messaging().onMessage(async remoteMessage => {
console.log('A new FCM message arrived!', remoteMessage);
PushNotification.localNotification({
channelId: "13761849018", // Ensure this matches your channel ID
title: remoteMessage.notification.title,
message: remoteMessage.notification.body,
playSound: true,
soundName: 'default',
importance: 'high',
priority: 'high',
});
});
return unsubscribe;
}, []);
Handling notifications while the app is in the background requires setting up background handlers.
useEffect(() => {
messaging().setBackgroundMessageHandler(async remoteMessage => {
console.log('Message handled in the background!', remoteMessage);
PushNotification.localNotification({
channelId: "13761849018", // Ensure this matches your channel ID
title: remoteMessage.notification.title,
message: remoteMessage.notification.body,
playSound: true,
soundName: 'default',
importance: 'high',
priority: 'high',
});
});
}, []);
This code snippet sets up a background message handler using Firebase Cloud Messaging (FCM) in a React Native application. When the component mounts, the useEffect hook registers a handler with messaging().setBackgroundMessageHandler to listen for incoming FCM messages while the app is in the background. When a message is received, the handler logs the message and uses PushNotification.localNotification to display a notification with specified properties such as channel ID, title, message, sound, and importance.
By setting up this handler, the app can manage and present notifications even when it is not in the foreground, ensuring that important messages are delivered and displayed to the user. The useEffect hook with an empty dependency array ensures that the handler is registered only once when the component mounts, providing a reliable and efficient way to handle background notifications.
import { AppRegistry } from 'react-native';
import App from './App';
import { name as appName } from './app.json';
import messaging from '@react-native-firebase/messaging';
// Register background handler
messaging().setBackgroundMessageHandler(async remoteMessage => {
console.log('Message handled in the background!', remoteMessage);
});
AppRegistry.registerComponent(appName, () => App);
This code snippet registers the main application component and sets up a background message handler for Firebase Cloud Messaging (FCM) in a React Native app. It imports the necessary modules, including AppRegistry from react-native, App from the local App.js file, and messaging from @react-native-firebase/messaging. The setBackgroundMessageHandler method is used to define a callback function that logs any messages received while the app is in the background, ensuring that these messages are handled properly.
Finally, the AppRegistry.registerComponent method registers the main application component under the name specified in app.json, enabling the app to run and display its UI. This setup ensures that the app can handle FCM messages even when it's not in the foreground, providing a seamless notification experience for the user.
package com.dbestech.RNfoodlyRes
import android.app.Application
import android.content.res.Configuration
import com.dieam.reactnativepushnotification.ReactNativePushNotificationPackage
import com.facebook.react.PackageList
import com.facebook.react.ReactApplication
import com.facebook.react.ReactNativeHost
import com.facebook.react.ReactPackage
import com.facebook.soloader.SoLoader
import expo.modules.ApplicationLifecycleDispatcher
class MainApplication : Application(), ReactApplication {
private val mReactNativeHost = object : ReactNativeHost(this) {
override fun getUseDeveloperSupport(): Boolean {
return BuildConfig.DEBUG
}
override fun getPackages(): List
{ // Get the list of packages from the PackageList
val packages = PackageList(this).packages.toMutableList()
// packages.add(ReactNativePushNotificationPackage()) // Add Package
return packages
}
override fun getJSMainModuleName(): String {
return ".expo/.virtual-metro-entry"
}
}
override val reactNativeHost: ReactNativeHost
get() = mReactNativeHost
override fun onCreate() {
super.onCreate()
SoLoader.init(this, /* native exopackage */ false)
ApplicationLifecycleDispatcher.onApplicationCreate(this)
}
override fun onConfigurationChanged(newConfig: Configuration) {
super.onConfigurationChanged(newConfig)
ApplicationLifecycleDispatcher.onConfigurationChanged(this, newConfig)
}
}
The provided code for the MainApplication class in a React Native application is crucial for initializing and configuring the application, especially when integrating various React Native packages such as push notifications. This class is typically found in the android/app/src/main/java/com/yourprojectname directory of your React Native project. It extends Application and implements ReactApplication, allowing it to manage the React Native environment and lifecycle events effectively.
One of the primary functions of this file is to initialize the React Native host, which manages the lifecycle of the React Native application, including the loading of the JavaScript bundle. Additionally, the MainApplication class initializes SoLoader, which is used for loading native libraries required by React Native.
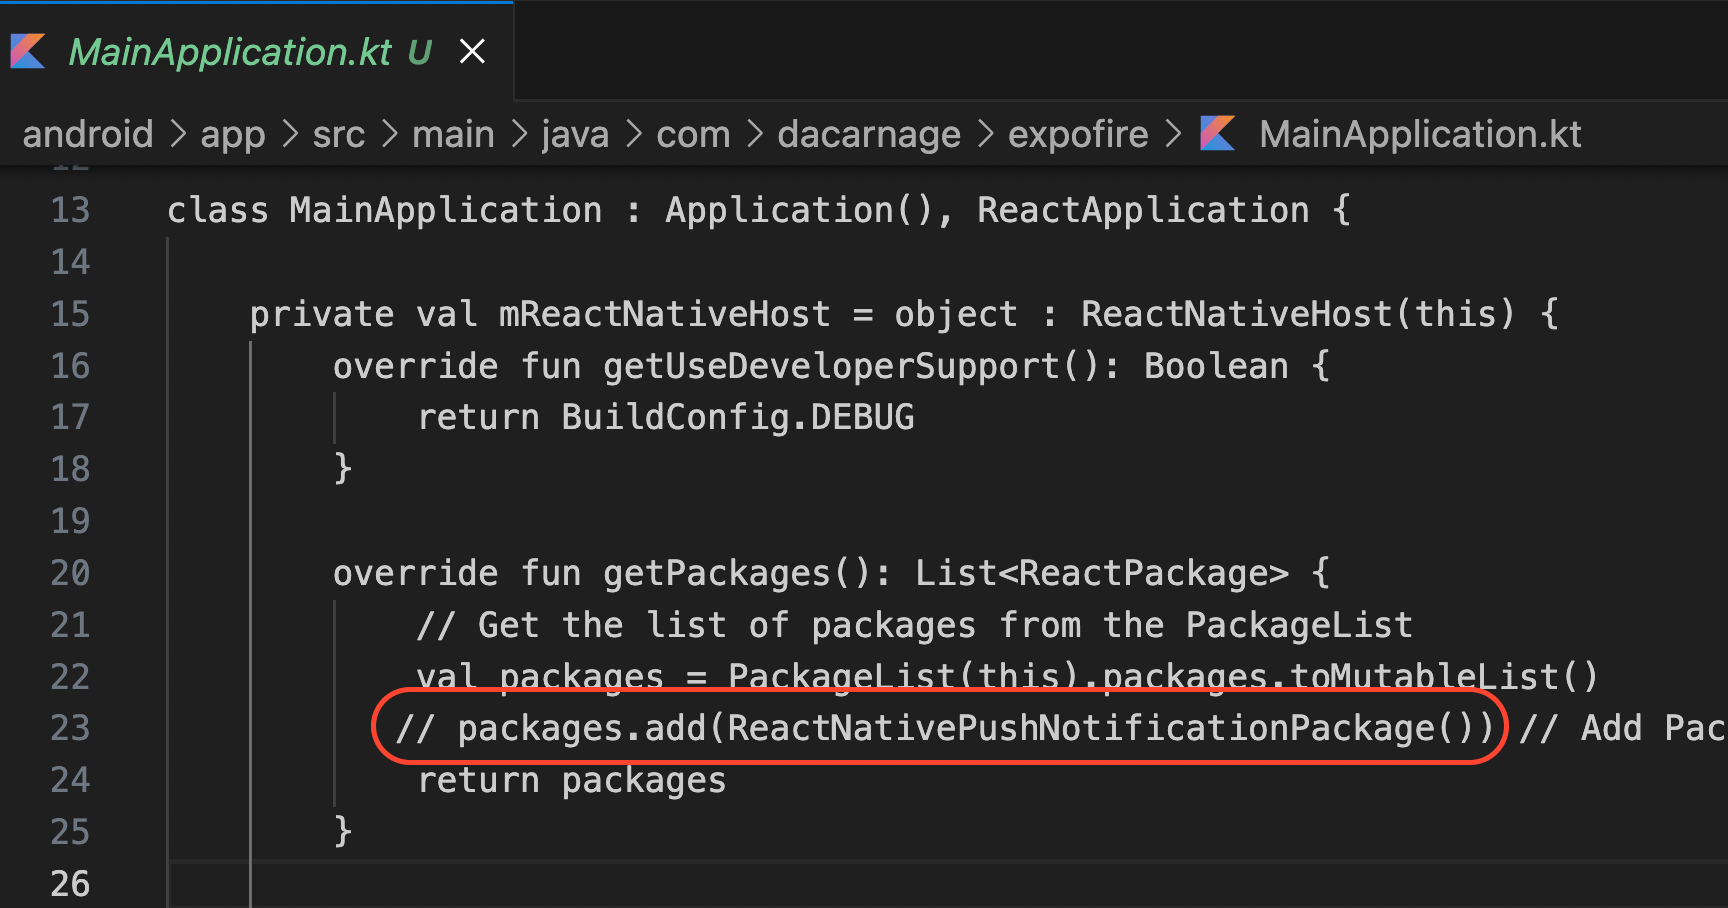
To enable push notifications in the application, you need to modify this file to include the React Native push notification package. This involves importing the ReactNativePushNotificationPackage and adding it to the list of packages returned by the getPackages method.
By doing this, you ensure that the push notification functionality is integrated into the React Native app. Furthermore, the onCreate method in this class is used to initialize various components and libraries when the application starts, ensuring everything is set up correctly.
The onConfigurationChanged method handles changes in configuration, such as screen rotations, ensuring the application adapts smoothly to these changes.

The above line in the red might not be necessary. If you uncomment this if you get error, you may comment it out.

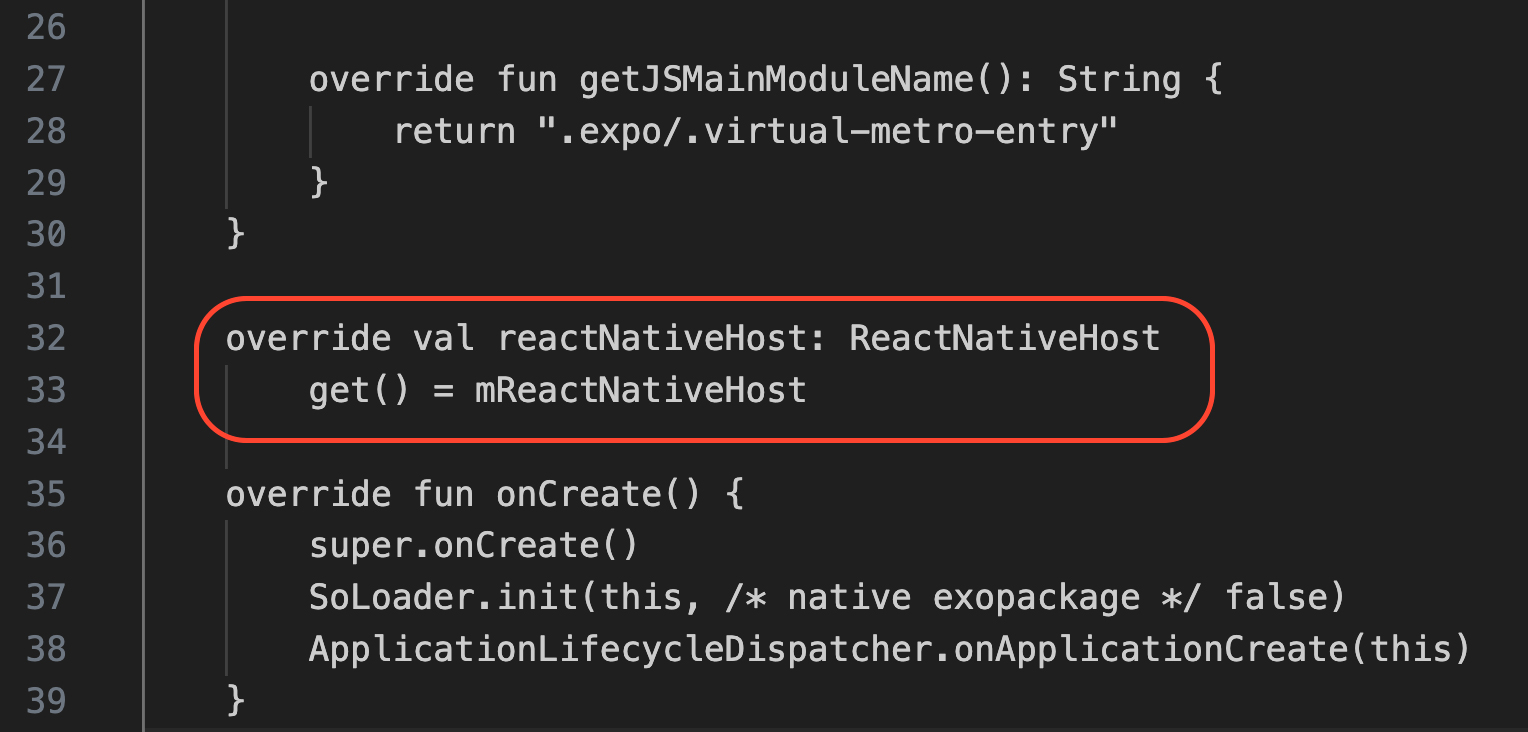
Here the code snippet is super important and you must have them. The default MyApplication.kt does not have this.
The reactNativeHost property in the MainApplication class is a crucial part of setting up a React Native application in Android. It overrides a property from the ReactApplication interface to provide a custom ReactNativeHost instance, which includes essential configurations such as the list of React Native packages and whether the app is in debug mode. The custom getter ensures that the correct instance of ReactNativeHost is used by the React Native framework to initialize and manage the application.
Problem: On Android 13+, explicit permission is required to display notifications.
Solution: Ensure you request notification permissions using the messaging().requestPermission() method.
Problem: Notifications do not appear because the notification channel is not created.
Solution: Create a notification channel using PushNotification.createChannel and ensure the channel ID matches when sending notifications.
Problem: Notifications are not displayed when the app is in the foreground.
Solution: Use the messaging().onMessage method to handle notifications in the foreground and use PushNotification.localNotification to display them.
Problem: Notifications are not handled correctly when the app is in the background.