Here we will see how flutter communicates with Webview using JavaScript channel. Here to follow the tutorial, make sure you installed flutter webview. Here's the package
webview_flutter: ^3.0.1
Also make sure your web end setup with an endpoint. We will load this endpoint using webview and add JavaScript channel. This webview pass data back and forth. The complete source code is given at the end.
Once they are done, we are good to go. Let's see how our Flutter code may look like in the Scaffold body section.

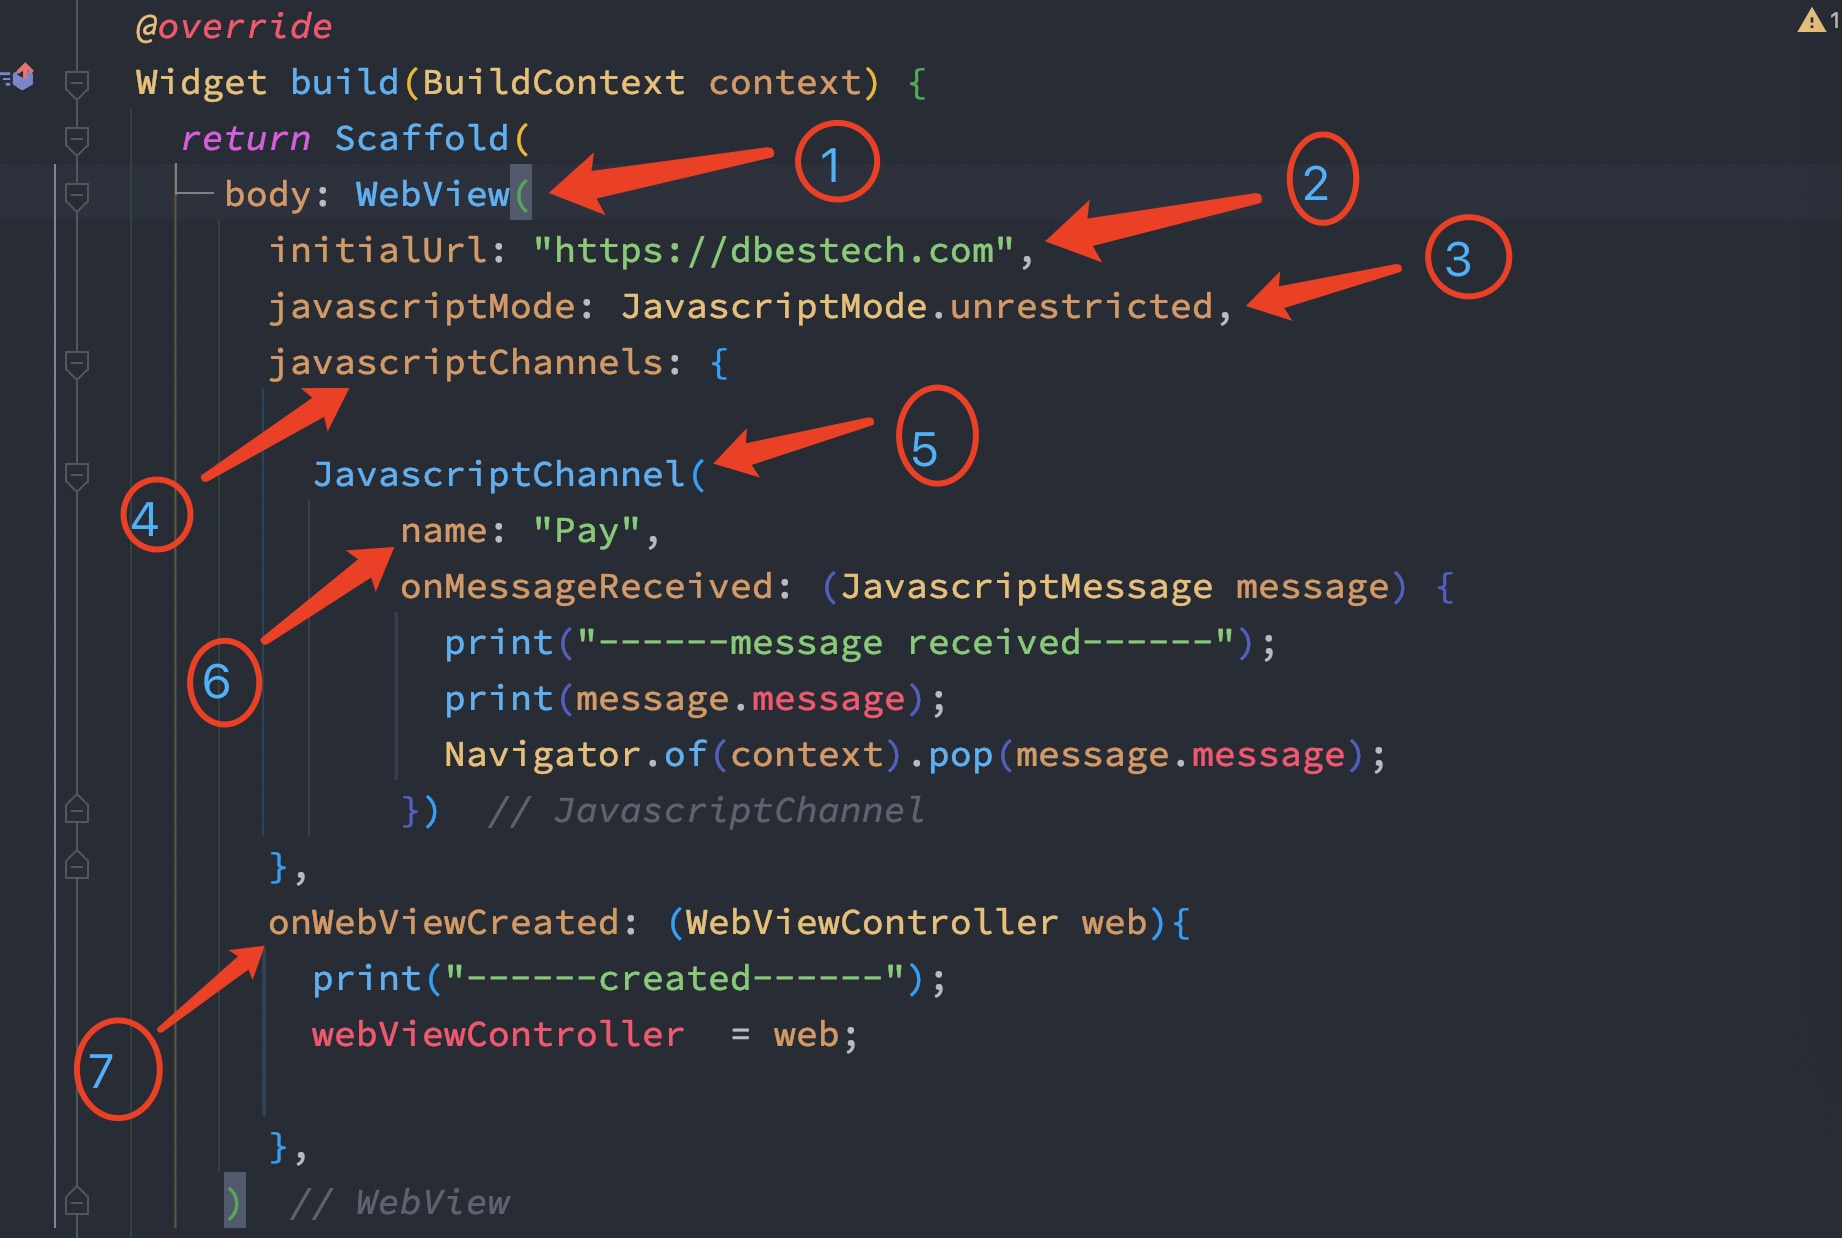
Here is the detail about each circle
1. First it is our WebView which we assinged to the Scaffoled body. WebView starts from here
2. Second, we used String for initialUrl. This url would be shown after our webview is created. Make sure you have the correct url.
3. Later we mentioned the we will allow any kind of webview to view on our app. Secure and non-secure apps are all allowed. Up to this point, your webview would be loaded. But it won't do any
4. JavascriptChannels is the most important since it allows us mention the channel name for communicating with Flutter app and WebView
5. JavascriptChannel is the actual channel creator with a given name
6. Here we assing the channel name or adding JavaScript to channel name
7. The last one actually creates a webview so that we can view it
Channel name
Among all the settings, channel name is the most important which is number 6. Whatever name you assign to the channel name, you must assign the name in the html code of your web end.
In our front-end code we put the name as Pay and we need to assign the same name in the web app html code.

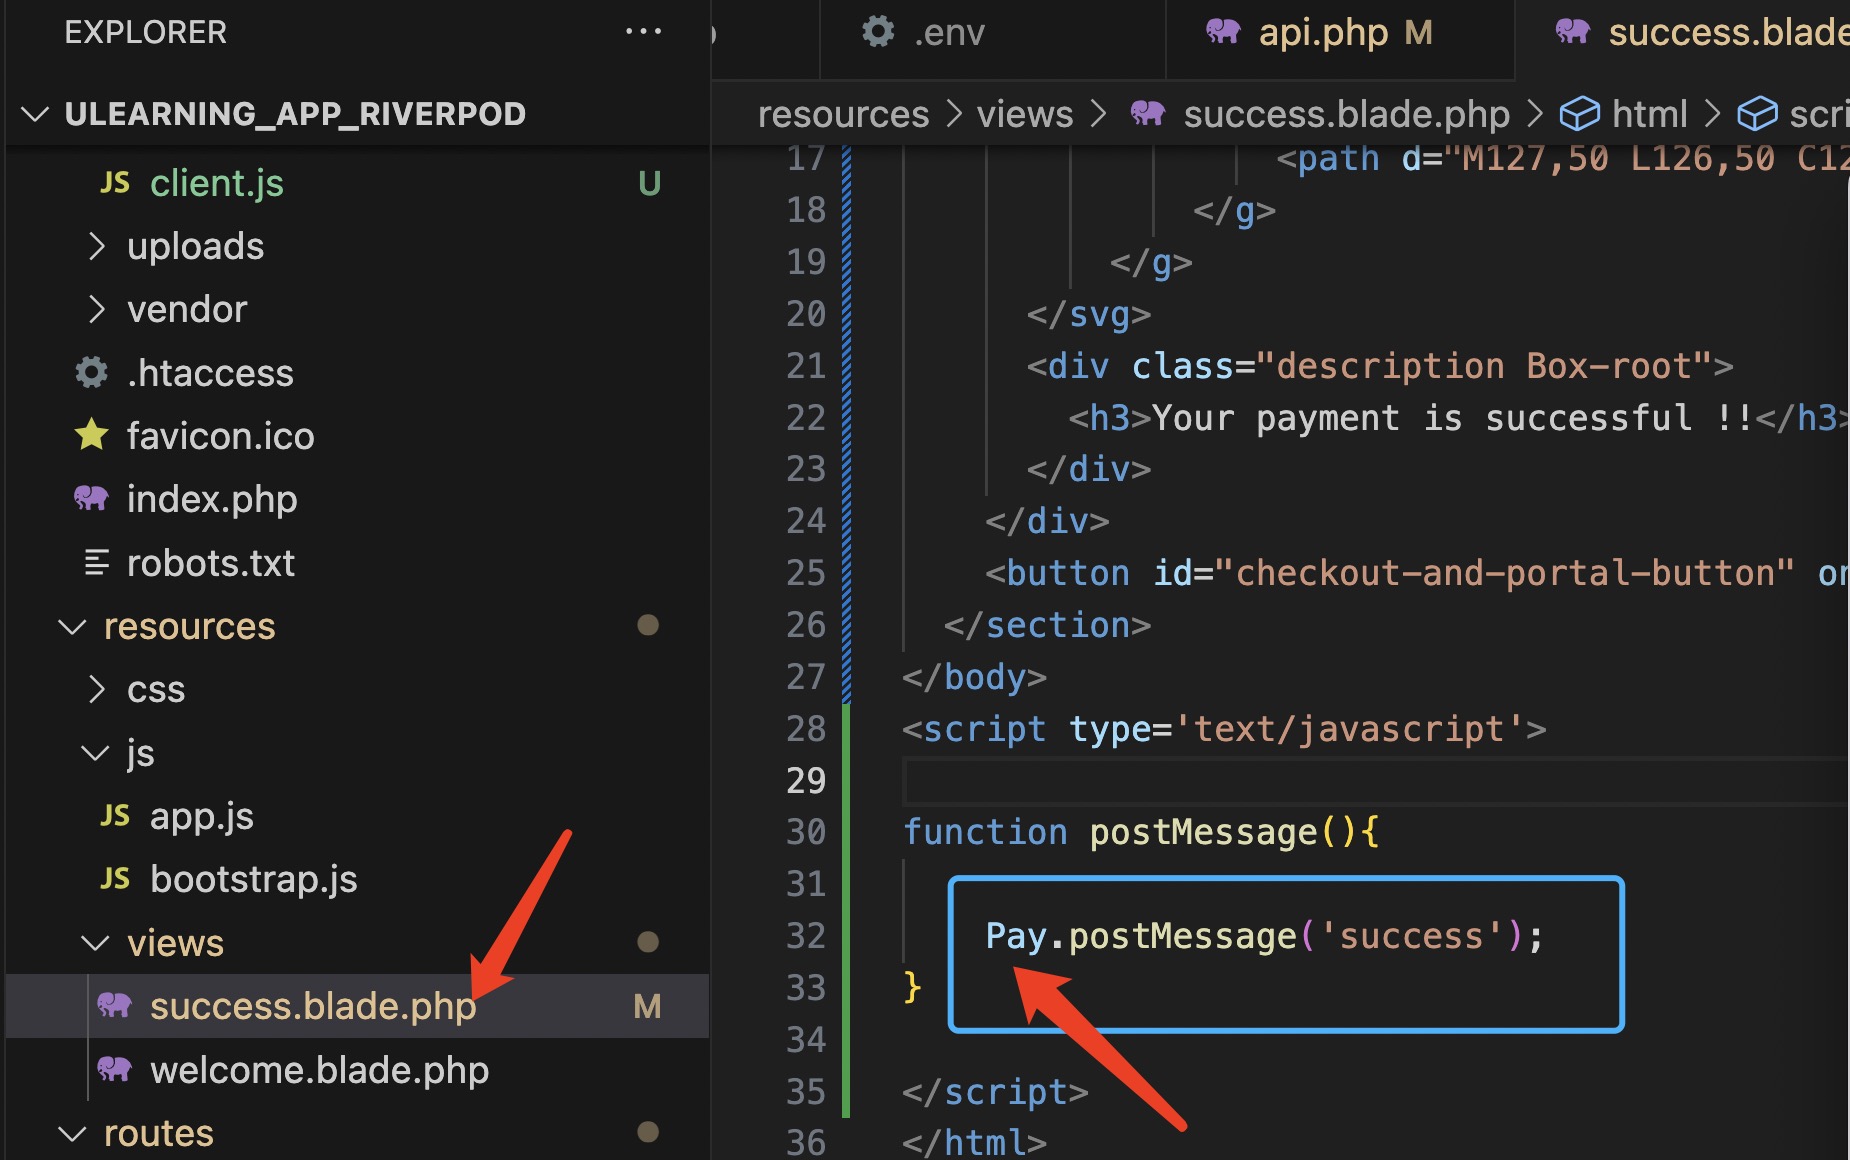
See in the above code, we have Pay as JavaScript object. This is actually the channel name, that we set in the Flutter-end.
Of course this Pay object has to be called postMessage() method. The method name could be anything. So if you call postMessage(), Pay object would send the string success to Flutter using the channel. The channel name is Pay.
So make sure you have a button in your html code, and the button should call a function, and the function should call the channel (Pay) and then it should do something. It is sending a string message to flutter. The string is success.
You see that we can print this in the console of Flutter.

That's how we communicate flutter with webview from a flutter app.
class FlutterWebView extends StatefulWidget {
  const FlutterWebView({Key? key}) : super(key: key);

  @override
  State<FlutterWebView> createState() => _FlutterWebViewState();
}

class _FlutterWebViewState extends State<FlutterWebView> {
  late WebViewController webViewController;
  @override
  Widget build(BuildContext context) {
    return Scaffold(
      body: WebView(
        initialUrl: "https://dbestech.com",
        javascriptMode: JavascriptMode.unrestricted,
        javascriptChannels: {

          JavascriptChannel(
              name: "Pay",
              onMessageReceived: (JavascriptMessage message) {
                print("------message received------");
                print(message.message);
                Navigator.of(context).pop(message.message);
              })
        },
        onWebViewCreated: (WebViewController web){
          print("------created------");
          webViewController  = web;

        },
      )
    );
  }
}
Html blade code
In my case, the below the html code resides in the server side html resource. You may put it anywhere in your server as long as it shows up in the webview, you are good to go.
<!DOCTYPE html>
<html>
<head>
  <title>Thanks for your order!</title>
  <link rel="stylesheet" href="css/style.css">
  <script src="js/client.js" defer></script>
  <meta name="viewport" content="width=device-width, initial-scale=1">
</head>
<body>
  <section>
    <div class="product Box-root">
      <svg xmlns="http://www.w3.org/2000/svg" xmlns:xlink="http://www.w3.org/1999/xlink" width="14px" height="16px" viewBox="0 0 14 16" version="1.1">
          <defs/>
          <g id="Flow" stroke="none" stroke-width="1" fill="none" fill-rule="evenodd">
              <g id="0-Default" transform="translate(-121.000000, -40.000000)" fill="#E184DF">
                  <path d="M127,50 L126,50 C123.238576,50 121,47.7614237 121,45 C121,42.2385763 123.238576,40 126,40 L135,40 L135,56 L133,56 L133,42 L129,42 L129,56 L127,56 L127,50 Z M127,48 L127,42 L126,42 C124.343146,42 123,43.3431458 123,45 C123,46.6568542 124.343146,48 126,48 L127,48 Z" id="Pilcrow"/>
              </g>
          </g>
      </svg>
      <div class="description Box-root">
        <h3>Your payment is successful !!</h3>
      </div>
    </div>
    <button id="checkout-and-portal-button" onclick="postMessage();">Go Back</button>
  </section>
</body>
<script type='text/javascript'>

function postMessage(){

    Pay.postMessage('success');
}

</script>
</html>
JS code
The below of the js code, this is the one that finds the channel name on the web end and send message.
document.addEventListener('DOMContentLoaded', async () => {
    let searchParams = new URLSearchParams(window.location.search);
    if (searchParams.has('session_id')) {
      const session_id = searchParams.get('session_id');
      document.getElementById('session-id').setAttribute('value', session_id);
    }
  });
The above js code is called html blade.
The above app has complete webview with Flutter stripe payment. You follow the tutorial.
2024-11-25 11:37:51
1