Flutter Cubit example state management app tutorial covered in detail Cubit, emit states, update list crud operations, load network data, different loading states using Cubit with a practicle app with a backend and restful api.
This tutorial is completely beginners friendly with beautiful UI. We started the lesson by building UI and slowly dive into Cubit and then backend.
This is a step by step beginners Cubit/BLoC Flutter tutorial. Here I explained everything from building beautiful UI to building your own simple API and how to use them them using BLoC.
If you tried to learn about Bloc, it would be hard to get your head around it. Here in my tutorial I have explained everything using picture combining with real code.
Well, you know BLoc needs events and states. They are combined using mapEventToState. Using this function(mapEventToState) based on events, states are created and rebuild the widget.
The above statement would be core focus of this tutorial. For advanced learners Flutter BLoC advanced tutorial is covered in the link.
Download the starter code here from the top (both for the carousel and the cubit app)
Complete code with backend Buymecoffee link
Complete Travel App Code With Backend
Patreon link
Complete Travel App Code With Backend
The above code link works for Flutter 3.13.0 versions(the code is most updated)
Flutter version=>3.13.0
Laravel version=>8.83
MySQL=>5.8
Last update 2023-08-23
Cubit App Architecture
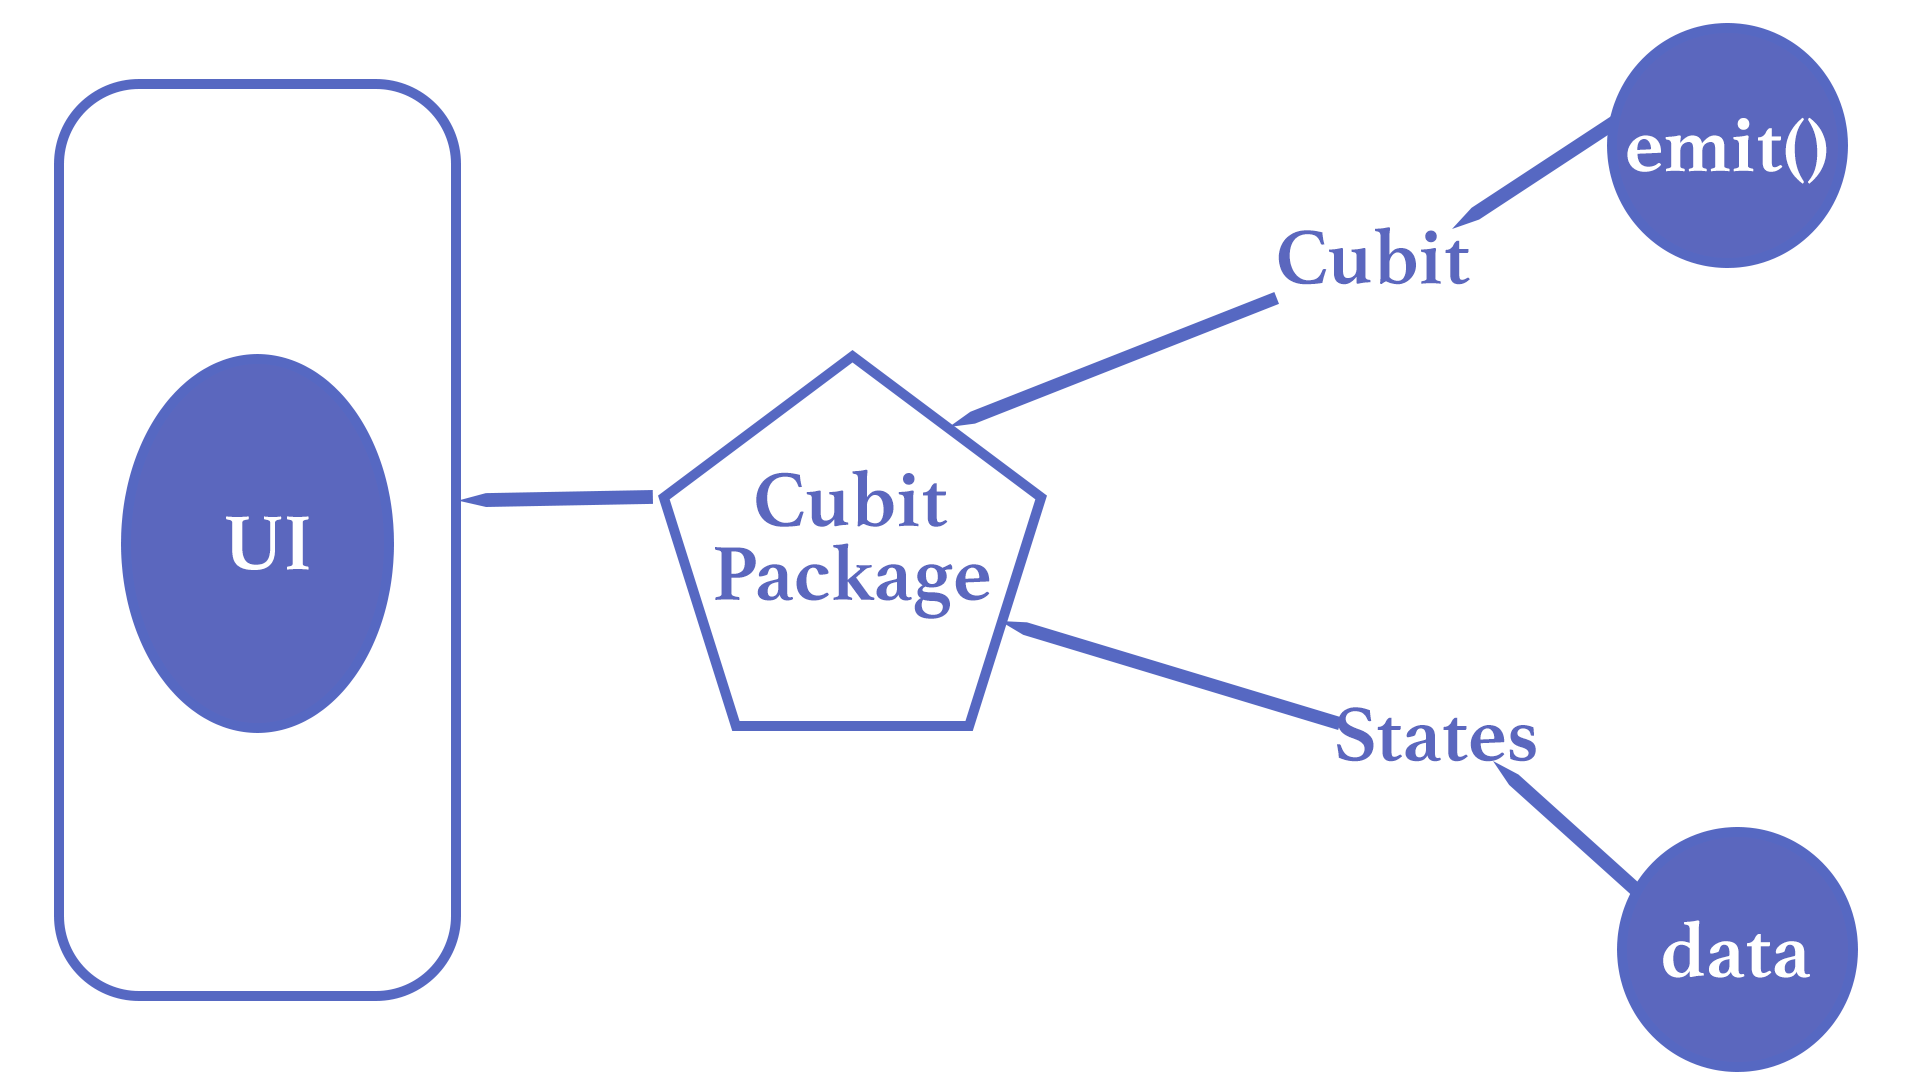
Here is a good news. If you try to use Cubit, you don’t need to create events. Take a look at the simplest architecture idea

A Cubit is similar to Bloc but has no notion of events and relies on methods to emit new states. Simply speaking, cubit contains states and based on request it emits(fires) the states.
See another diagram for cubit with network request

Here we see that, we can accomplish network request using cubit.
Two other important concepts about Cubit. It has two important classes. We will use them through out the app.
√ BlocProvider
This one creates cubit for the app, and also specify the entry point for using cubit
√ BlocBuilder
This one checks all the states and ask for ui change

Every Cubit requires an initial state which will be the state of the Cubit before emit has been called.
Just like BLoc we need to create a Cubit first. We will create a Cubit using BlocProvider just like Bloc creating.
Create Cubit and State
In our app we will cubit and state. There are two classes I created for them
√ AppCubits that extends cubit
√ CubitStates that extends equatable
The Complete Cubit App
The above app tutorial covers a lot of about Cubit and emitting states. In part one, we have shown how to load data from the network and update and show the data on the UI. In this process we have covered how to do loading state and data loading done state with Cubit.
In part two we have shown how to store app in the app itself. Like you can choose number of people on the detail page. You can do it individually for each page. So the data is stored on the page. And if you go to other page and come to the same page you will see your selected data is still persisted.
The second part covers a lot about how to use List and Cubit together. At the same time we have covered how to add data in the List, update the List data and then eventually persist the data with Cubit.
At the end of the course you will master
Install Backend
Create the states
Here we define some states. You need at least one initial state. States are triggered from emit() function. The function emit() can get called from your UI through BlocProvider.of<>(context) and emit states when necessary. Here props is the list of properties that will be used to determine whether two instances are equal.
Creating states are easy. In general first you need to create an abstract class, this abstract class should extend Equatable. Equatable is package that helps you know if two states are same or not.
Create the cubits
We need to build a class that extends Cubit. Cubit itself takes state.
The current state of a Cubit can be accessed via the state getter or state keyword.
you need to initialize a state using super() during cubit initialization. So you can do like below to create a cubit and initialize cubit
class AppCubits extends Cubit{
         AppCubits():super(InitialState());
}
So extending Cubit and passing a State class is super important. As well as calling the super constructor with InitialState().
Accessing cubit and state from ui

At the core, you need to use BlocProvider.of
Errors & Solutions
2. If you get error with image, pls check out the below settings for img folder

Check out pubspec file setting

And then restart your app
2. Overflow in the homescreen
If you see overflow in the homescreen than wrap the column using a SingleChildScrollView widget
3. Row overflow of text on the right detail_screen.dart
4. Make detail_screen scrollable
2024-09-23 00:06:35
very good
2024-09-23 00:06:35
very good
2024-09-23 00:06:35
very good
 Starter file